If you’re gaming on Linux with a high-refresh-rate monitor (like 120Hz or 144Hz), you might not always want your games running at that maximum rate. Sometimes, dropping a game to 60Hz is ideal—not only for consistent frame pacing and saving power, but crucially to fix flickering issues that can occur when VRR (Variable Refresh Rate/FreeSync/G-Sync) is enabled on certain displays at high refresh rates. By forcing the display to exactly 60Hz, you also perfectly lock your game to 60fps without relying on in-game limiters that can introduce input lag.
Instead of manually changing your display settings before and after playing, you can automate this perfectly on CachyOS (or any KDE Wayland setup) using Feral GameMode and kscreen-doctor.
Here is how to set your monitor to automatically switch to 60Hz when a game starts, and revert to 120Hz when the game closes.
Step 1: Find Your Monitor’s ID and Modes 🔗
Since CachyOS typically ships with KDE Plasma, we can use kscreen-doctor to seamlessly control display settings via the terminal.
Open your terminal and run:
kscreen-doctor --outputsLook closely at the output to find two things:
- Your Output Name (e.g.,
Output: 1 DP-1means your monitor isDP-1). - The Mode IDs for your desired refresh rates. Under the
Modes:section, locate the ID number for your native resolution at 60.00Hz and 120.00Hz.
(For example, Mode 5 might be 3440x1440@60.00, and Mode 3 might be 3440x1440@120.00).
Step 2: Create the GameMode Automation Script 🔗
GameMode allows us to run custom scripts exactly when a game starts and ends. We will map our kscreen-doctor commands to those triggers.
Create or edit your GameMode user configuration file:
nano ~/.config/gamemode.iniPaste the following block into the file. Make sure to replace DP-1 and the mode numbers with the exact values you found in Step 1:
[custom]
# When a game starts: Switch DP-1 to 60Hz (Mode 5)
start=kscreen-doctor output.DP-1.mode.5

# When a game ends: Switch DP-1 back to 120Hz (Mode 3)
end=kscreen-doctor output.DP-1.mode.3
Save and exit (Ctrl+O, Enter, Ctrl+X).
[!TIP] You can test these commands manually in your terminal before playing to ensure the screen actually flickers and changes refresh rates! Just type:
kscreen-doctor output.DP-1.mode.5
Step 3: Hooking Steam Games to GameMode 🔗
Even with the configuration ready, GameMode won’t activate unless Steam is explicitly told to use it for your game.
To enable it:
- Open Steam.
- Right-click the game you want to lock to 60Hz and select Properties.
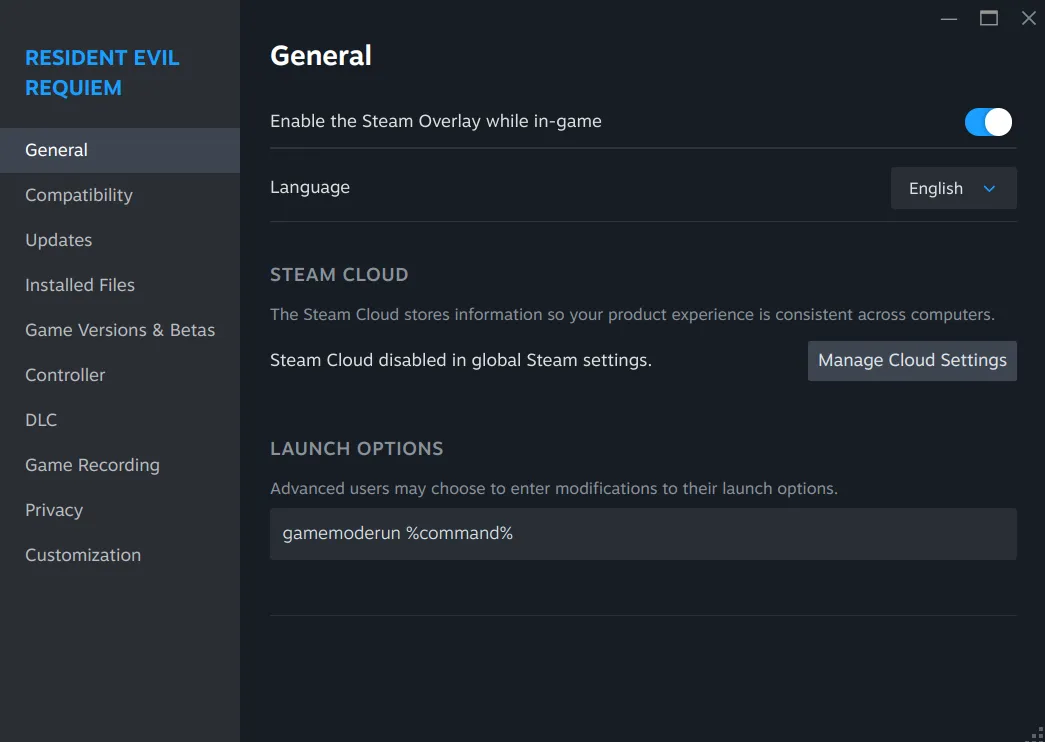
- In the General tab, scroll down to Launch Options.
- Type in:
gamemoderun %command% - (Optional but recommended) In your game’s internal settings, turn on VSync or set the frame limit to 60fps matching your new display rate for the smoothest experience.
- (For games without an internal FPS limiter) If a game doesn’t have a way to limit the frame rate in its menu, you can use MangoHud to restrict it. Instead of the command in step 4, use this:
MANGOHUD_CONFIG=fps_limit=60 mangohud gamemoderun %command%
Here is what that looks like in Steam:
You’re Done! 🔗
Launch the game! Your screen should briefly flicker as it drops down to a stable 60Hz, providing a smooth, flicker-free VRR experience. The moment you exit the game, GameMode will release its hooks, and your sleek 120Hz desktop will instantly return.
If you ever want to check if GameMode successfully hooked into your game, just open a terminal while the game is running and type gamemoded -s to see its active status. Happy gaming!